News
Book Page Silhouette
April 24, 2020As a part of National Library Week, altered book crafter, Jessica Pratt, the General Services Librarian from the Carbondale Public Library, is going to show you how to make old-fashioned silhouette portraits using book pages and materials you most likely have around your house.
The Art of Silhouette Portraiture has been around for centuries. It was really popular in the early to mid 1800s as a substitute for more expensive painted portrait miniatures. There were even dedicated silhouette artists who either used specialized equipment to trace the outline of the subject or would simply freehand the image. The practice would eventually be superseded when photography became inexpensive and easily available. Though no longer the preferred method of portraiture, the art is still practiced today by people who like the old time style of a silhouette portrait.

Wikipedia Commons Unknown Author/Public Domain
Altered Books is a fancy way of saying art or craft projects made from books or book pages. It means changing (altering) the book’s original purpose (reading) into something new (a work of art.)
Materials:
Sharp Pencil
Heavy sheet of paper such as drawing paper, construction paper, or card stock
Scissors (the tinier the better)
Black Paint or Markers
Glue
Paint Brushes
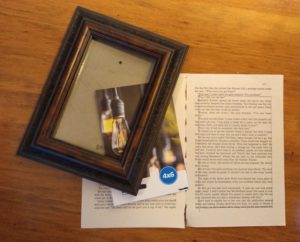
Picture Frame
Book Pages – If you want to make it personal, use your subject’s favorite book as long as you don’t mind ruining it. As a librarian, I have access to a lot of worn out or damaged books that I use for my altered book projects.
Step 1: Draw an Outline of Your Subject
When I was younger, my dad used to make silhouette portraits using an old fashioned camera obscura, which was a dark box with lenses that could be used to project and image onto a screen within the box. I’m going to assume most of us do not have access to a camera obscura or even a projector so here are a few other suggestions for making your outline:
- The easiest way is to find/take a picture of your subject, load it onto your computer, and print it out.
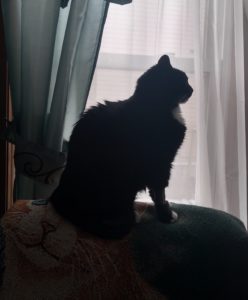
The purrfect silhouette
- You can freehand the outline like they did in the old days.
- You can trace your subjects shadow or their profile directly.
- As a last resort, if you have a device with a screen protector, you can try placing a sheet of light paper and very gently going over the outline. However, even with the screen protector, I cannot guarantee that this method won’t scratch/damage your phone or tablet so use this method at your own risk.
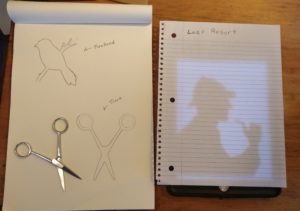
Methods 2, 3, and 4
Step 2: Designing the Silhouette
Once you have your outline, you are going to cut it out, flip it over, and trace it onto the heavy sheet of paper. Why trace it onto a separate sheet of paper and not directly onto the book page? There are several reasons for doing this. One, it is much more difficult to fix mistakes on the book page. Two, you will get a much crisper edge. Three, the image will stand out more if it is on top of the base page rather than a part of it. (It’s also how artists did it traditionally.)
Once you have your outline, you can start to play with it a little bit. You don’t want to alter the profile of the nose or remove too much chin fat (as tempting as it may be) because, in the end, you still want it to look like your subject. However, you can add subtle details like hair texture or eye lashes to add visual interest to the overall design. Also, if you are drawing a human portrait, another technique you can try is playing with the shape of the bottom of the image. A straight line can look a little blunt. Try adding a curve to the bottom. It may take a couple of tries before you get it the way you like.

Small changes to help your silhouette stand out.
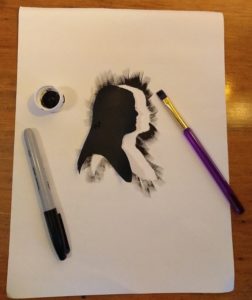
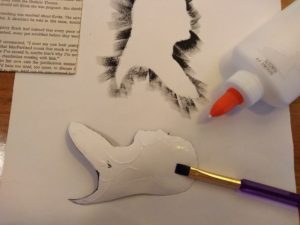
Once you are happy with how your silhouette looks, use a small pair of scissors to cut it out. Flip it over and review it one last time before moving onto the next step (even with small scissors, some details can get lost and you might want to fix them.)
Grab your paint, markers, watercolors, crayons, or whatever you’d like and paint your silhouette. Traditionally silhouettes are black or dark brown but feel free to use whatever colors you’d like!
Step 3: Preparing the Book Page
While you wait for your silhouette to dry, you can can turn your attention to your book page background. I personally like to use pages with lots of texts on them but you may want a page with lots of dialog or your favorite quote.
To cut the pages down to the right size, use the sheet of paper or piece of glass that came with the frame as your stencil. The glass will be particularly helpful if you are trying to highlight a particular quote. (Note however, most frames to have a slight overhang over the picture.) Once you are happy with the way your page looks, trace around the stencil, and cut the page to size.
4. Almost There
Finally, glue your silhouette onto your book page. I recommend using a paint brush to spread the glue out. This will help the glue to reach the fine details, like hair, and will prevent glue lumps when you press it down onto the book page.
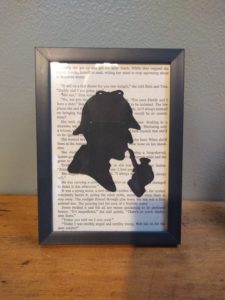
Once it is dry, you can add it to the frame.
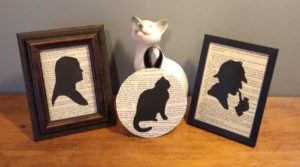
Feel free to experiment with your silhouette projects. I hope you enjoyed this tutorial and discovered a new way to show your love of books.
Happy National Library Week!